
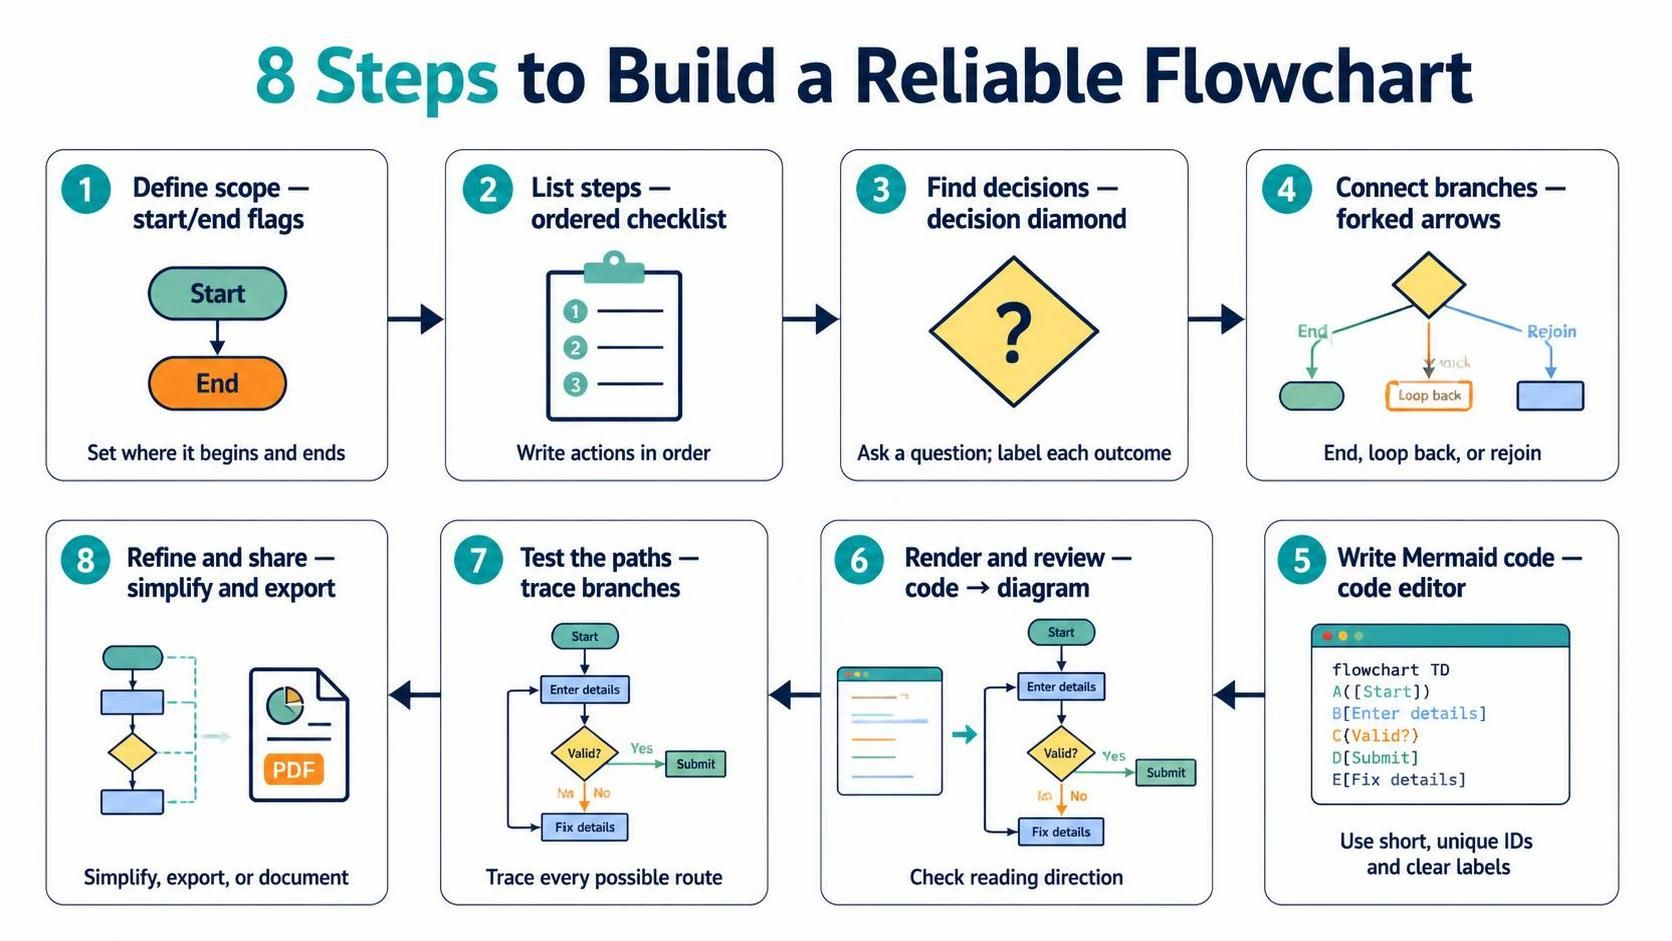
Creating a reliable flowchart is an essential skill for system architects, software engineers, and business analysts. It bridges the gap between abstract requirements and concrete system logic. However, manual drawing tools can often lead to inconsistent styling and difficulty in version control. By adopting a “Diagram as Code” approach using tools like the Visual Paradigm VPasCode Editor, you can ensure your diagrams are consistent, reproducible, and perfectly aligned with your documentation.
This tutorial walks you through the 8-step methodology presented in the reference diagram, transforming a textual process into a robust Mermaid flowchart.
Step 1: Define Scope – Start and End Flags
The foundation of any reliable flowchart is a clear boundary. Before writing a single line of code, you must explicitly state where the process begins and ends. In flowcharting, these are represented by the “Terminator” shape (often an oval or rounded rectangle). This prevents ambiguity about the entry and exit points of your system.
- Start Node: Represents the trigger event or the entry point of the user.
- End Node: Represents the successful completion of the task or the termination of the process.
Step 2: List Steps – Ordered Checklist
Once the boundaries are set, list the actions in the order they happen. This is the linear backbone of your flowchart. Think of this as writing a checklist for the system. In the code, these are “Process” nodes, typically represented by rectangles.
Example Logic: “First, the user enters details. Then, the system validates them.”
Step 3: Find Decisions – The Decision Diamond
Real-world processes are rarely linear; they require branching logic. Identify all decision points where the flow must split based on a condition. In flowcharting, this is the “Diamond” shape. The critical rule here is to phrase every decision as a question with explicit outcomes.
- Yes/No: Binary choices.
- True/False: Logical conditions.
- Valid/Invalid: Data validation states.
Step 4: Connect Branches – Forked Arrows
This is the most complex part of the topology. You must decide the fate of each branch:
- End: Does this branch terminate the process?
- Loop Back: Does this branch return to a previous step for correction?
- Rejoin: Do different branches merge back into a single flow?
Step 5: Write Mermaid Code – The Code Editor
Now, translate the visual logic into text using the Mermaid syntax. This is where the VPasCode Editor shines. You will assign short, unique identifiers (IDs) to every node and use descriptive labels for readability. The syntax follows a simple id[Label] or id(Label) structure, connected by arrows.
Below is a code snippet representing a standard “Data Validation” process:
flowchart TD
    A([Start]) --> B[Enter Details]
    B --> C{Valid?}
    C -- Yes --> D[Submit]
    C -- No --> E[Fix Details]
    E --> B
Step 6: Render and Review – Code to Diagram
After writing the code, render the diagram immediately. The goal here is to check that the diagram reads in the intended direction. Does the flow move logically from top to bottom or left to right? Are the decision labels (“Yes”/”No”) clearly pointing to the correct paths? If the rendered diagram looks tangled, your code logic needs refinement.
Step 7: Test the Paths – Trace Branches
A reliable diagram must handle all edge cases. Perform a “path tracing” test. Start from the Start node and manually trace every possible route to a End node.
- Happy Path: Trace the “Valid” path where everything goes right.
- Edge Case: Trace the “Invalid” path. Does it loop back correctly? Does it allow for infinite recursion, or does it eventually resolve?
Step 8: Refine and Share – Simplify and Export
The final step is optimization. Look for overly busy sections in your diagram. Can you merge two simple steps? Can you simplify a complex label? Once the diagram is clean and accurate, export it (as PDF or PNG) or include the raw Mermaid code directly into your documentation (like README files or Jira tickets) for future maintenance.